Music Theory Lecture Tech
When thinking about technology and interfaces, I like to think in terms of POVs: What do I see? What do my students see?
Before diving into the music course content itself, I’ll share a bit about the basic setup I’m currently using for teaching in-person courses (which is different from how I lecture remote and hybrid). Check out my other articles exploring my relationship with music education technology.
For seasoned educators and presenters reading this, these observations and tips might be obvious. As a conservatory-trained flutist suddenly lecturing music theory and musicianship in classrooms of 20-120 students, I wasn’t given any kind of manual for how to organize my teaching technology. What helped me get started was to think about elements of design I am drawn to, including: flexibility, modularity, and clarity. Defining what those mean to me made it much easier to choose what technology I bring into my lectures.
When thinking about technology and interfaces, I like to divide into these POVs:
What I see
What my students see
As soon as I know what room I’m teaching in, I want to answer the following:
What technology does the classroom have?
What size does my text need to be for students in the back of the room to read clearly?
I am currently teaching a ~25 person course in a standard classroom that has a piano, stereo, and projector. Tech-wise, I add my Macbook Pro and iPad. While this course is entirely synchronous, for hybrid courses I also use my iPhone + external microphone for video recording the course, which I then edit together with screen recordings made using OBS.
I’ve noticed that more and more of my students are taking notes on iPads and other tablets. My course design philosophy needs to be compatible with diverse note-taking and organizational methods. As a general rule, I like to distribute my course content in at least 2 different mediums, so that students can pick and choose what works for them.
Using the iPad in Lecture
Since 2017, I’ve been performing almost exclusively using my iPad. I’m used to writing on my iPad and am comfortable with it. It’s already something that’s part of my daily toolkit, and I’ve fully integrated it into my teaching as well.
Note taking on the iPad
Notability
I use Notability for note-taking on the iPad. I’ve found that it has the best combination of features, along with an excellent handwriting engine. It uses iCloud to sync, and I view my notebooks using the Mac version of the app.
Like most other notebook apps, Notability allows me to import custom backgrounds to write on (various sizes of staff paper), in addition to easily annotating PDFs. I’ve tried a bunch of other apps but am always returning to Notability.
Something I’d like to try is Notability’s built-in screen record function, which allows you to link audio recordings to annotations. This would allow students to listen back to the class recording and see me writing my notes in real-time. I wish I had something like this when I was in college!
ForScore
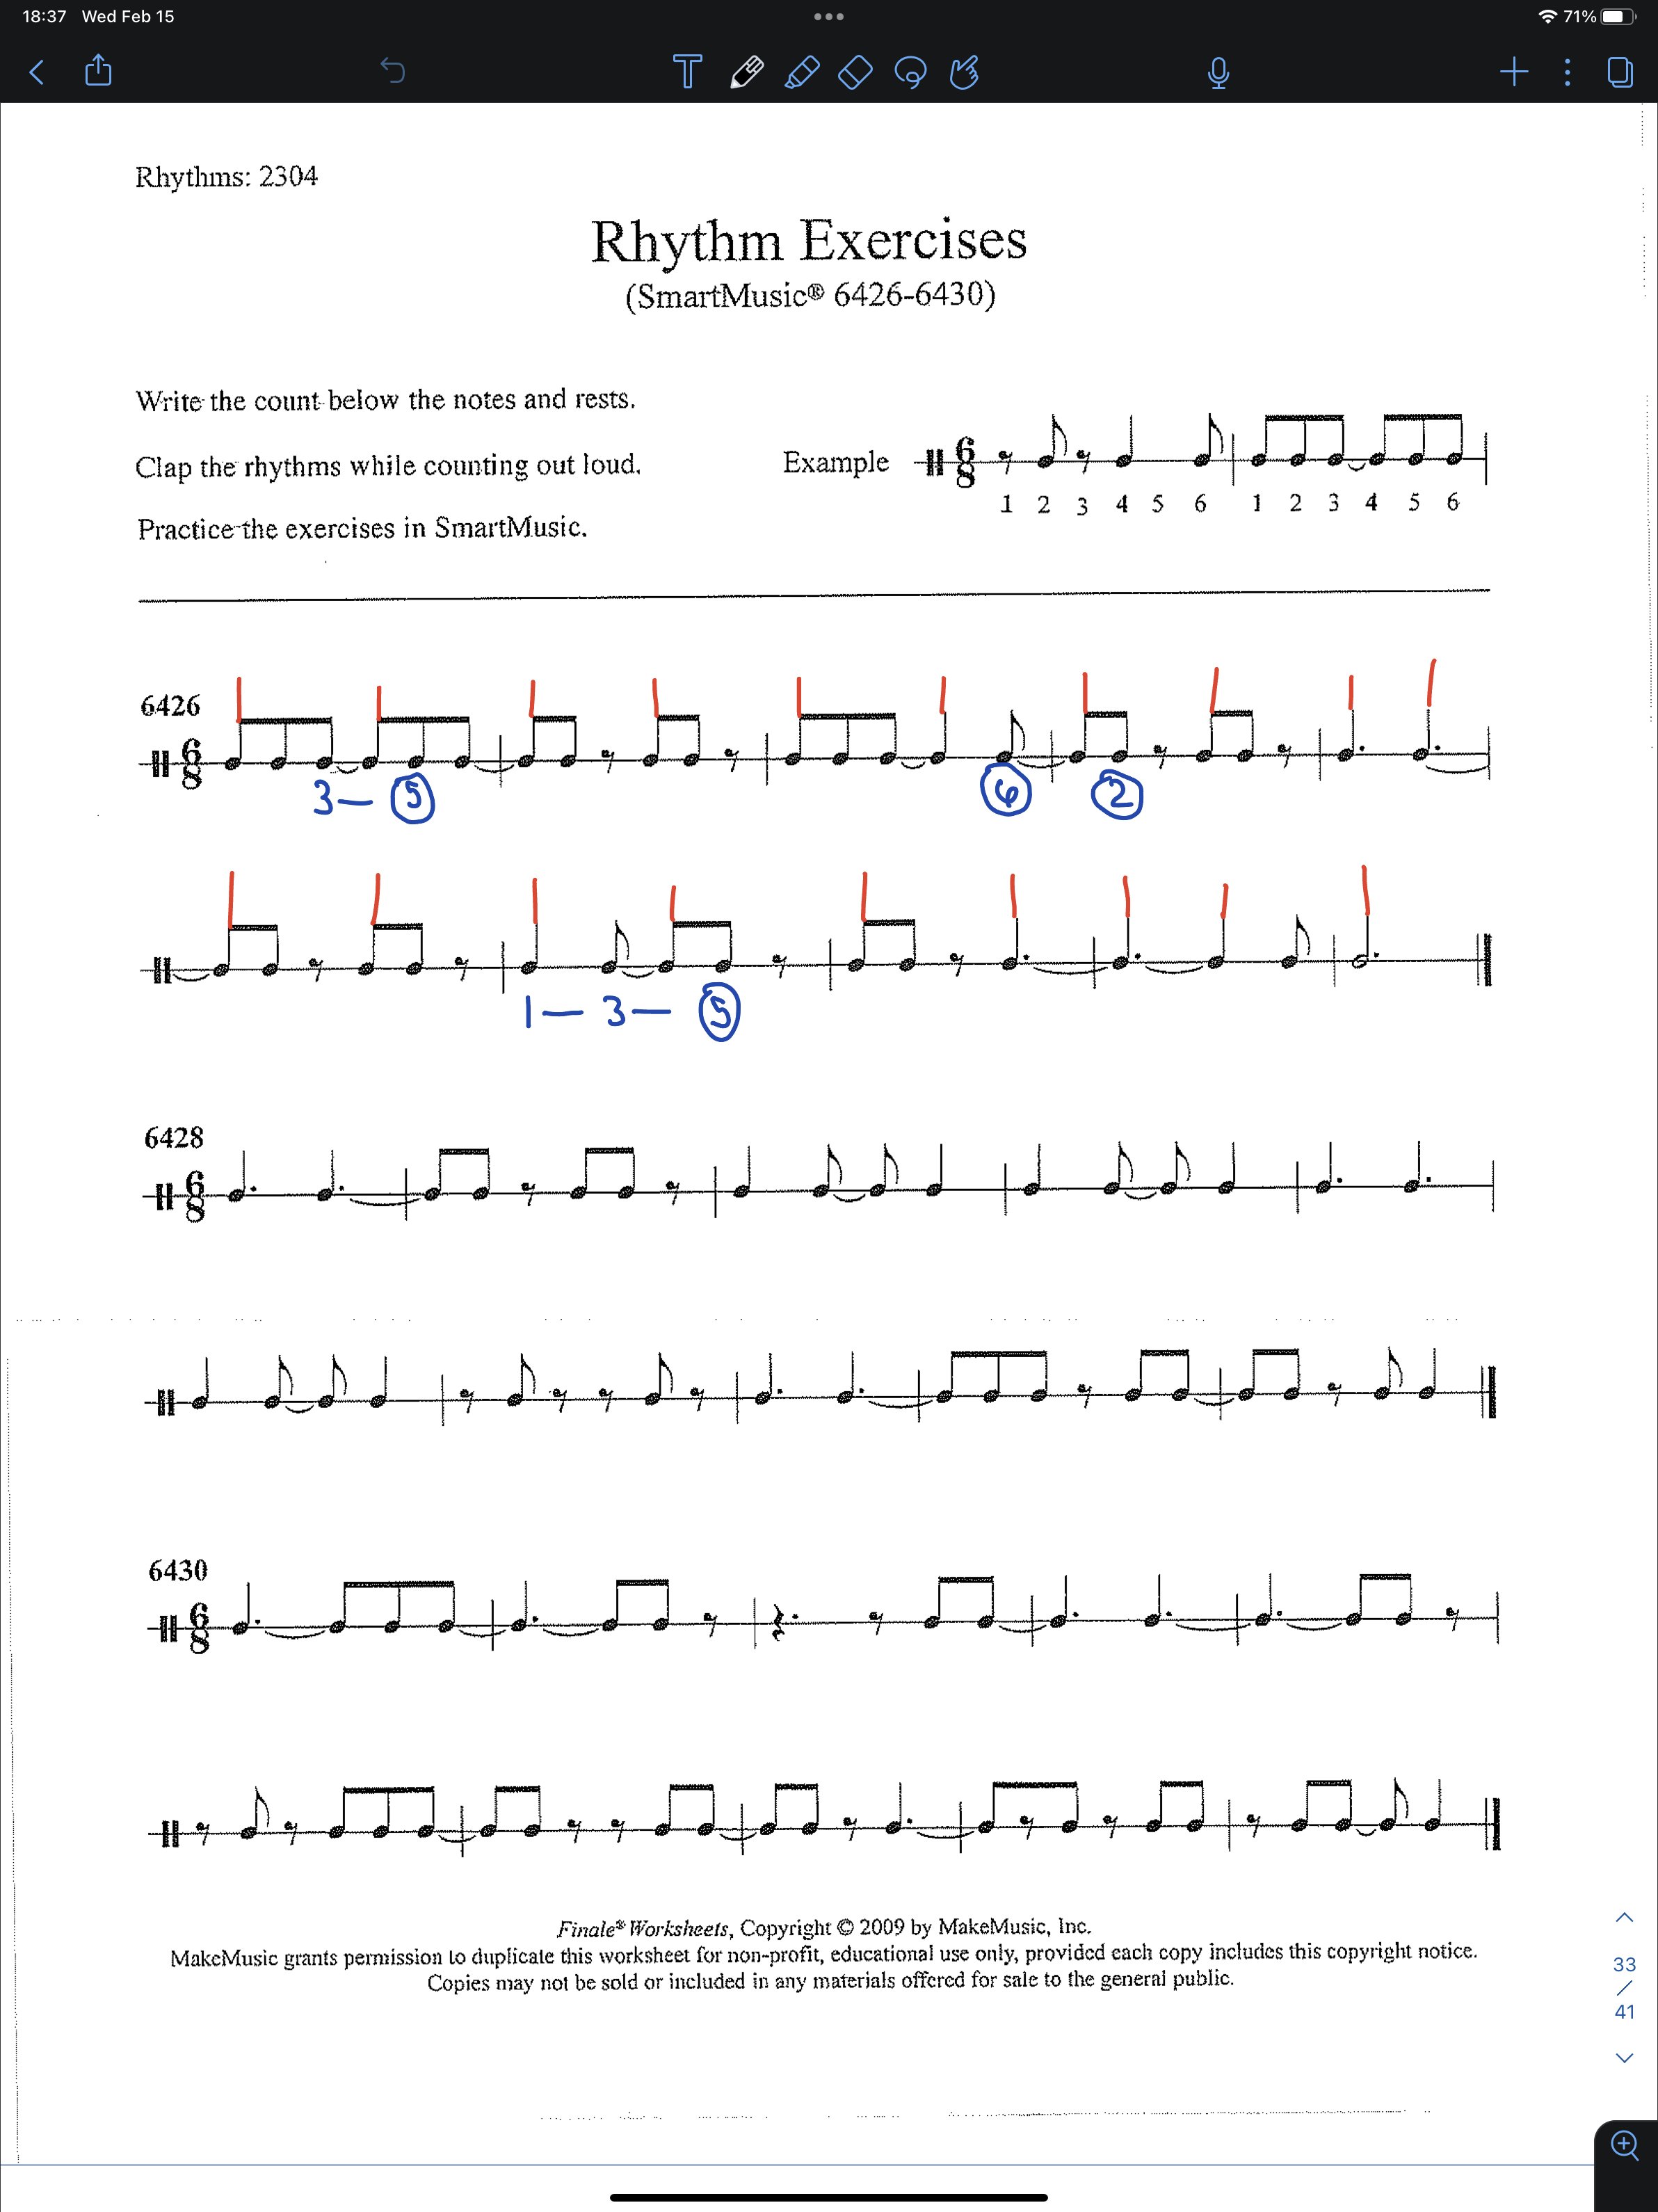
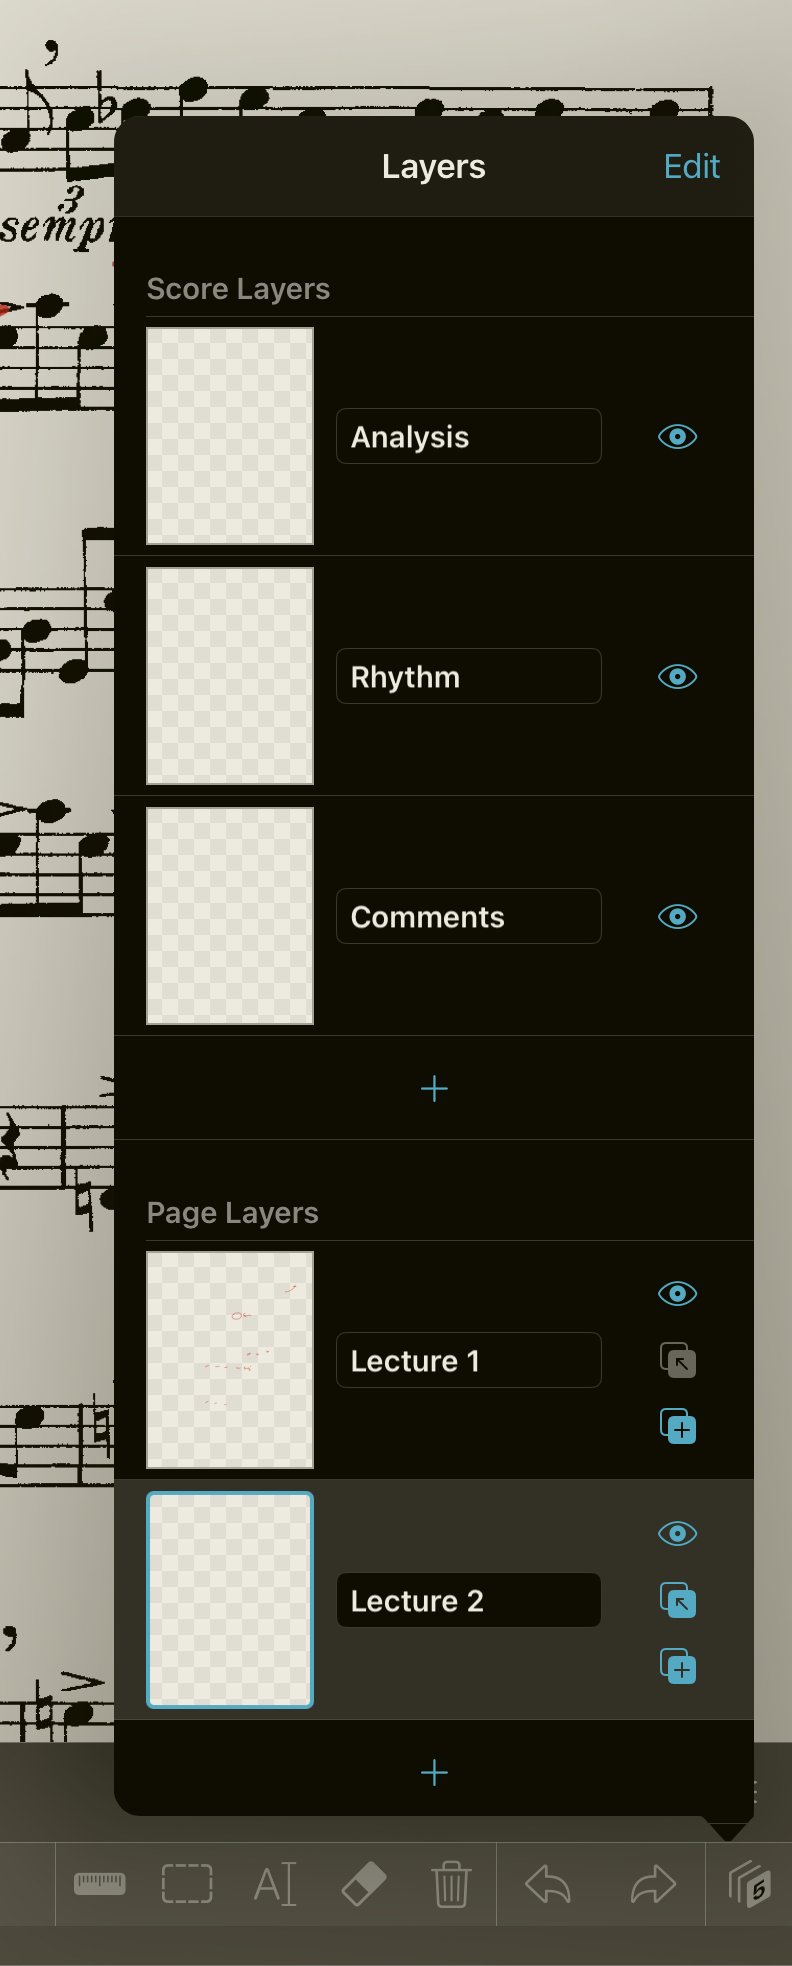
While the ultimate sheet music app for iOS needs no introduction, I haven’t fully realized its potential for lectures. The ability to quickly add annotation layers makes it a great tool for analyzing scores in class. You can even have separate layers for different sections/lectures in case you use the same materials multiple times.
In the past, I’ve spent lots of time adding custom overlays annotate scores in Google Sheets, only to get frustrated by its limitations (I am not very good at making presentations). Given ForScores intuitive annotation features and ability to create custom “stamps” for common markings, this is a great solution for annotating scores in real-time and making analysis feel a bit more interactive.
Getting the iPad to the TV (or projector)
AirPlay (Free, Built-in)
AirPlay makes it easy to mirror an iPad screen to a computer, but it gets a bit trickier if I want to show students my computer desktop at the same time as they are viewing my iPad screen. For example, I often show a PDF on the left-hand of the screen, while taking notes on the right side of the screen on my iPad.
Reflector (Paid)
Reflector allows you to stream any device’s screen to a host computer, which can be then viewed as a window. I really like this app because of its ability to screen record and stream audio directly from the device.
Quicktime Player (Free, Built-in)
Apple’s built-in QuickTime Player achieves the same thing using its screen record function. While it doesn’t work wirelessly like Reflector (which doesn’t work on university networks anyway) and occasionally gives me glitches, it’s free and has most of Reflector’s functionality, especially if I’m already screen-recording using something like OBS.
Live Interaction with the Class
In addition to learning pedagogical strategies for increasing student engagement, I’ve been experimenting with tools for getting more live interaction with the class.
Slido (Free, Paid Upgrade Available)
Slido is an easy way to add interactivity to lecture and increase engagement.
There’s a very easy integration Slido for Google Slides integration that is extremely easy to use, especially if you present using Chrome. I have found it to be very stable and intuitive to use. I generally dislike designing slide presentations (and sitting through them), and this has been one of the first tools I’ve genuinely enjoyed using. In addition to lots of options for creating live polls, quizzes, and a Q&A feature, Slido allows me to choose whether or not responses are fully anonymous, or if they show up anonymously on the board while saving names internally.
I use Slido for tracking attendance and participation. It’s an easy way to link participation and engagement to the class materials in a way that doesn’t feel like completing a checkbox.

Slido makes it super easy to track engagement and participation with your polls.
My purely anecdotal experience has been that giving students an additional path to interaction has allowed students who are otherwise quiet more opportunities to engage. I’ve had moments when a student sends me a question via the chat that I engage with, after which the student who asked it speaks up and shares more!
Documentation
For my MUS 101A course in Fall of 2022, I accommodated asynchronous students by posting lecture recordings the evening after I taught, instead of streaming live over Zoom while also lecturing in-person (which I find to be extremely challenging).
For my asynchronous students, I wanted to capture the experience of sitting in the classroom, as opposed to seeing me talking into a webcam. Just like how in the beginning of the article I mentioned “POVs,” I thought about what the in-person documentation setup would need to look like so that I focus my attention on students in the classroom, while also capturing something that would be engaging for students watching the course remotely. I also have a theory that high-quality documentation benefits students attending in-person class as well, allowing them to re-engage with their memory of being in class
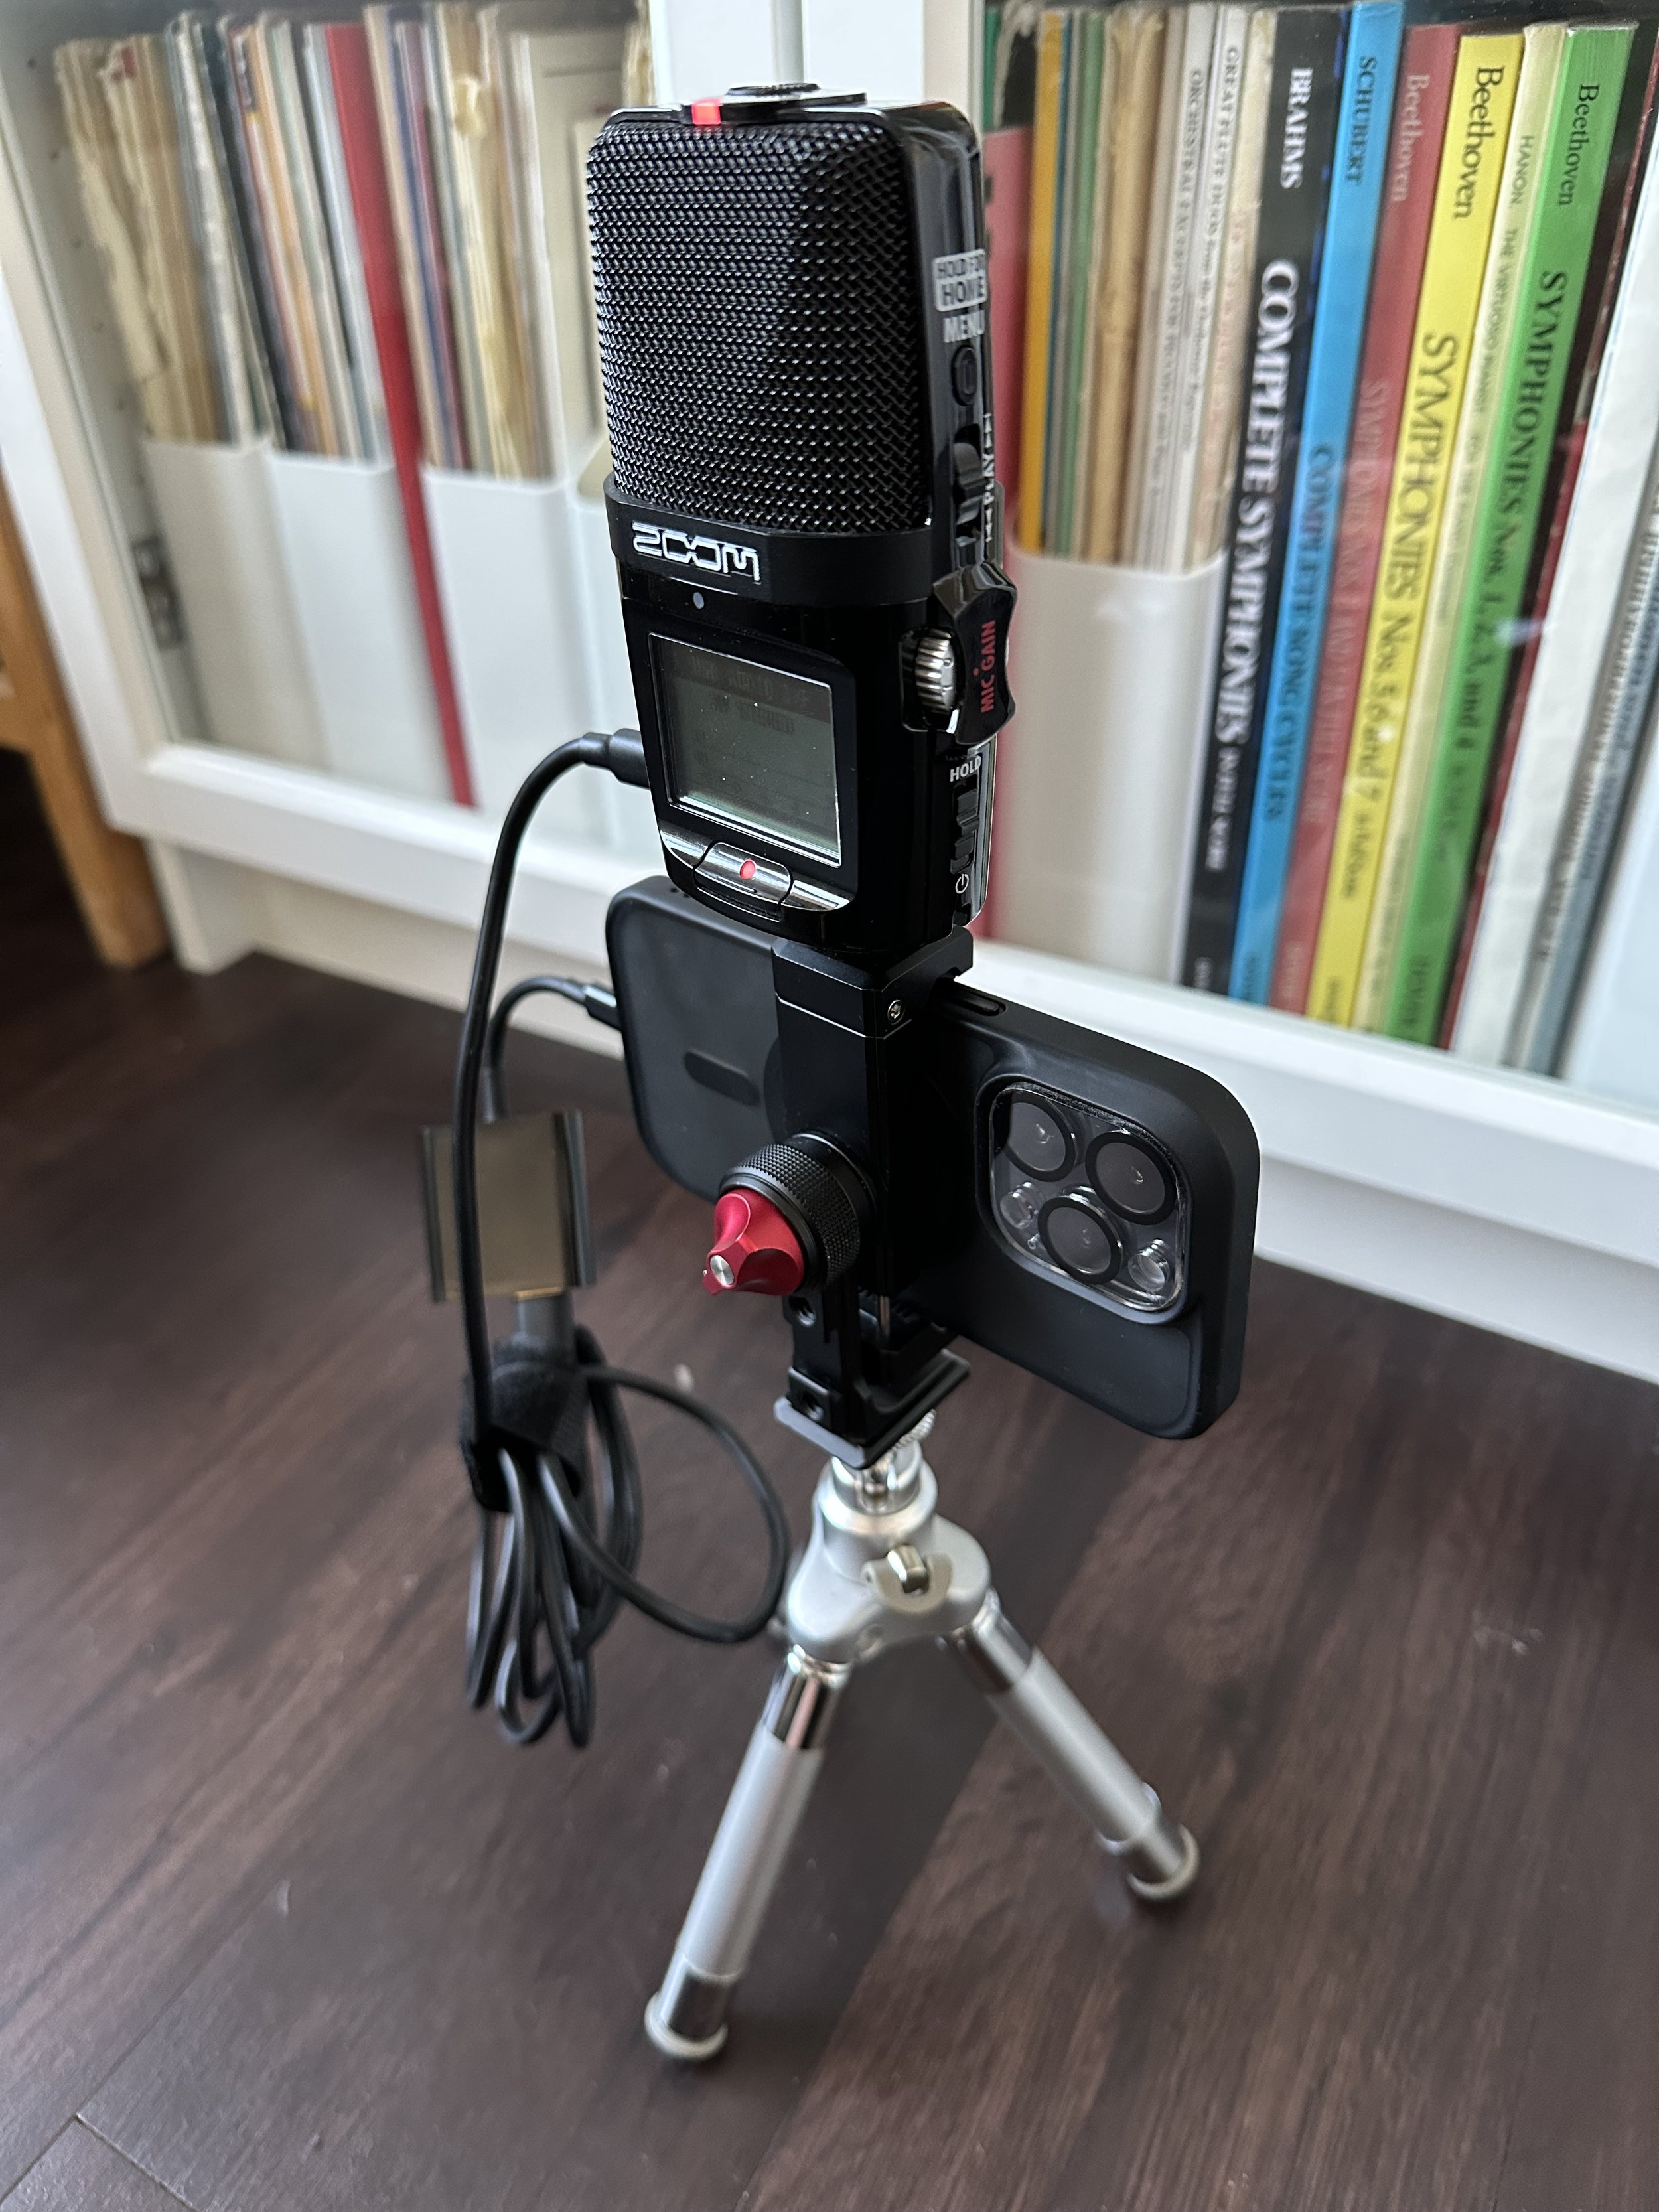
iPhone and Zoom H2n mounted on a tiny tripod. I love how compact this setup is!
Recording Setup
iPhone and Zoom Mount
I record using an iPhone mounted on a tiny tripod using a metal tripod adapter. I’ve used a bunch of adapters in the past, I like this one because:
Compatible with Cold Shoes & Arca Port for expandability.
I use a Hot Shoe Mount Adapter to attach the Zoom H2n to the top
Extremely durable. Plastic Adapters fall apart. This one has even gone hiking!
Easy to use with a full-size tripods and microphone stands.
Audio Recording
The built-in microphones are pretty decent on iPhones, so you might not even need this step. I personally use the Zoom because of its compactness, great sound quality, and multiple recording modes: X/Y, Mid-Side, 2 and 4-channel surround.
Last year I taught in-person lectures that were simultaneously streamed over Zoom (Zooming Zoom audio over Zoom?). I had a lot of success placing the H2n in the middle of the room (we were seated all at a large table). Because of the 2-channel surround mode, I could mix it so students online had the effect of hearing me on one side, and other students on the other side. Pretty cool!
I connect the H2n to the iPhone using a generic camera connection kit. (Note: the quality control on these is so-so, make sure to test out the audio/charging connection. Hopefully future iPhones switch to USB-C!)
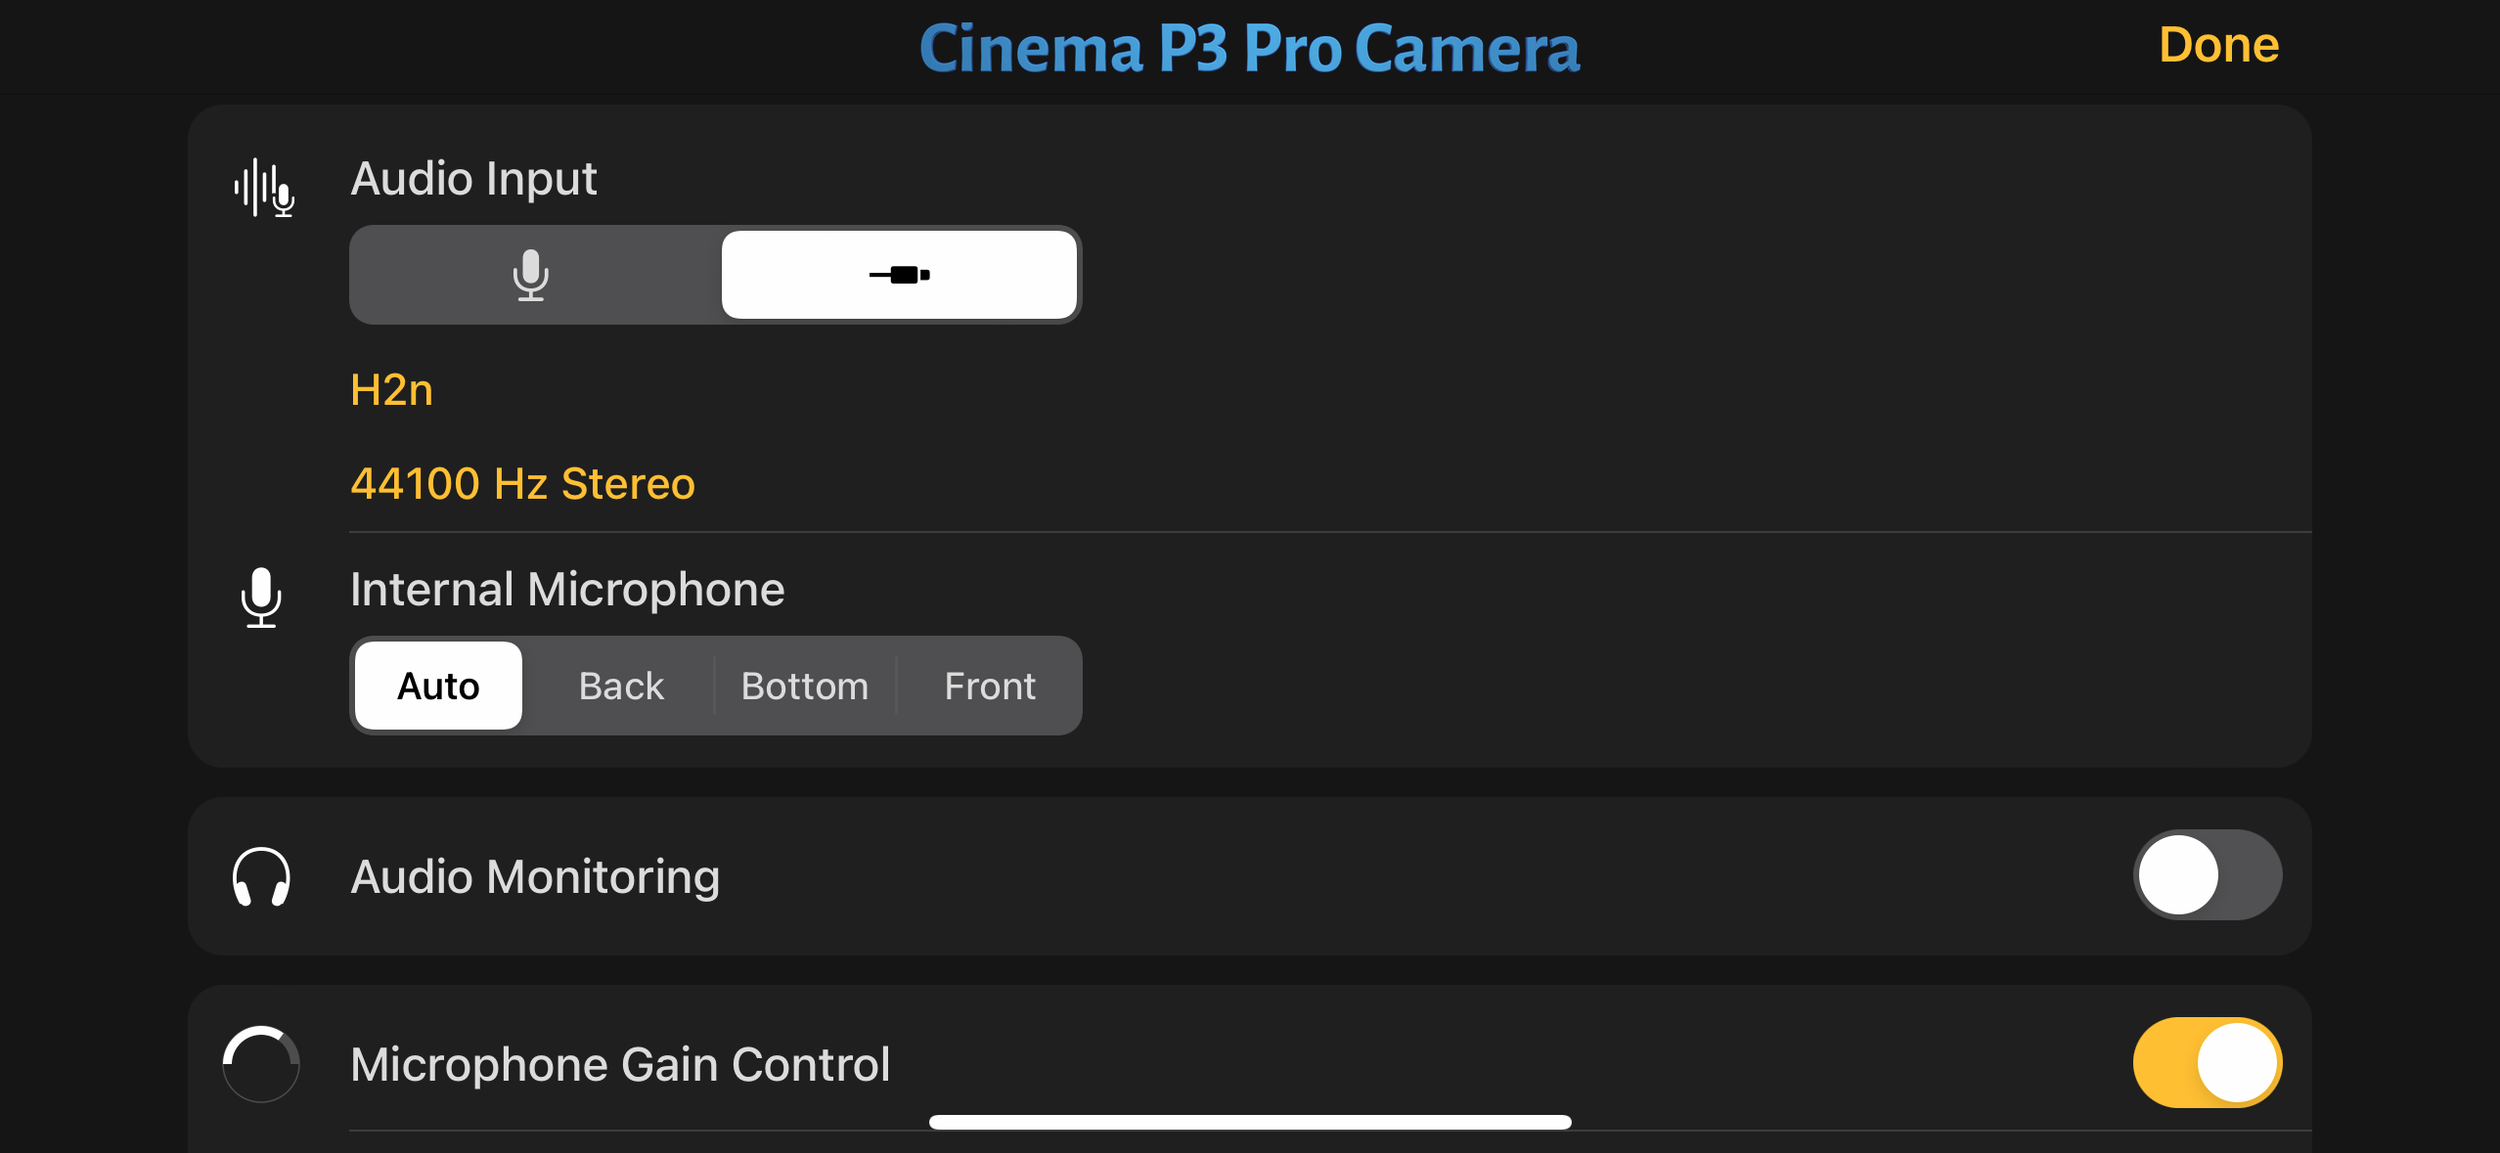
Cinema P3 Pro has recently replaced Filmic Pro for me.
Video Recording
When using an external microphone with an iPhone, you’ll want to use a dedicated video-recording app that allows you to switch between microphone inputs. For many years I used Filmic Pro, but have now switched to Cinema P3 Pro because of Filmic’s switch to a subscription model (nothing against subscriptions, I just personally needed to streamline mine…).
You can use the free version of Cinema P3, but I chose to upgrade (~$7.99 at the time of writing) for one hugely feature:
Audio Monitor Toggle
This is very important when I’m using the Zoom H2n (or Zoom F3, my other portable recorder) to record live playing. The recorder allows you for direct input monitoring to avoid latency. In the Cinema P3 app I turn “audio monitoring” off so that I don’t hear the direct monitoring and the app’s monitoring. This is an extremely useful setting that I wish all developers added to their camera apps.
I miss a few things from Filmic, including its ability to simultaneously record using multiple camera angles, as well as the ability to use a second device as a remote control. I might come back to Filmic Pro someday, but for now Cinema P3 Pro fits my needs perfectly.
Editing and Sharing Lecture Recordings
After lecture, I AirDrop the video over to my computer, do a quick edit in FCPX (QuickTime or iMovie is also ok), and post on a private YouTube playlist that is crossposted to Canvas. Even some of the students who attended lectures wanted to rewatch lecture recordings. I later found out that having a video that looked/sounded like you were actually in the room made a big difference for students. (Imagine what would be possible if I also added Notability’s interactive notes!) In this course I didn’t need to do a screen recording, but could easily have added it to the setup and created a multicam clip in post.
This brings me to my final point:
Design for Modularity and Flexibility
The pandemic required educators to quickly adapt to an unfamiliar medium, simultaneously accommodating multiple teaching modalities. In our department, the 2021-22 academic year was still in limbo in terms of whether or not courses would be entirely remote, hybrid, or in-person, making it extremely difficult to plan course logistics with any kind of lead time. For the 2022-23 year, I wanted to make sure that the design of my courses could quickly shift modalities if necessary.
Going forward, I think I’ll always do the basic prep for an equivalent hybrid/remote option that can potentially accommodate asynchronous participation. While the exact plan doesn’t always need to be fully realized, building in flexibility into course design from the outset makes it much easier to adapt as needed.
In my (limited) experience designing courses, I have found it very useful to separate issues of technology from content. From a technological perspective, designing for the digital music classroom shares similarities with being content a content developer. Thinking about these issues in these terms makes it easier for me to visualize how my students will interact with the content I share.

-
March 2023
- Mar 28, 2023 Review: A First Look at Apple Music Classical Mar 28, 2023
- Mar 10, 2023 A Chat with Artusi’s VPs of Technology, Marketing, and User Experience Mar 10, 2023
- Mar 3, 2023 Review: Artusi Interactive Music Theory and Aural Skills Mar 3, 2023
-
February 2023
- Feb 15, 2023 Music Theory Lecture Tech Feb 15, 2023
- Feb 14, 2023 Music School in a Digital World Feb 14, 2023